How To Turn Off Do Not Disturb On IPhone 13: The Ultimate Guide
Alright folks, let’s dive straight into it—how to turn off Do Not Disturb on iPhone 13. Whether you accidentally activated it or just need a quick fix, we’ve got you covered. This feature is super handy when you want some peace and quiet, but sometimes, well, life happens, and you need those notifications back. So, let’s figure out how to switch it off without losing your cool.
Now, you might be thinking, “Why is this so complicated?” Trust me, it’s not. Apple has made it pretty straightforward, but hey, with all the settings scattered around, it’s easy to get lost. That’s why I’m here—to guide you step by step so you can reclaim your iPhone’s full potential. No more missed calls or texts because Do Not Disturb got in the way.
Before we dive deep into the nitty-gritty, let’s talk about why this matters. If you’re reading this, chances are you’ve experienced the frustration of not hearing your phone ring during an important call or missing a critical notification. Turning off Do Not Disturb is more than just flipping a switch—it’s about regaining control over your device and staying connected when it matters most. So, buckle up, and let’s get to it!
- Alice Cooper Net Worth A Deep Dive Into The Wealth Of The Rock Legend
- Keith David The Voice Behind Spawn
Understanding Do Not Disturb on iPhone 13
First things first, what exactly is Do Not Disturb? It’s like a digital bubble that shields you from distractions. When activated, it silences all notifications, calls, and alerts, giving you the peace you need—whether you’re sleeping, working, or just chilling. But hey, sometimes you need those notifications back, and that’s where knowing how to turn it off becomes crucial.
On the iPhone 13, Do Not Disturb isn’t just a simple toggle; it’s a powerful tool with customizable options. You can set schedules, allow calls from specific contacts, and even enable it only during specific events. But when it’s time to turn it off, you want it done fast and easy. That’s where this guide comes in.
Why Would You Want to Turn It Off?
Let’s face it, Do Not Disturb is awesome, but it’s not always practical. Here are a few reasons why you might want to deactivate it:
- Jamie Fraser Of Outlander A Journey Through Time And Love
- Tyreek Hills Kids A Deep Dive Into The Life Of The Nfl Stars Family
- You’re expecting an important call or message.
- You’re in a situation where staying connected is crucial.
- It was accidentally turned on, and now your phone feels like it’s in ghost mode.
- You just want to enjoy life without missing out on the digital buzz.
Whatever the reason, turning off Do Not Disturb is a quick fix that can save you from a world of frustration.
Step-by-Step Guide: How to Turn Off Do Not Disturb on iPhone 13
Ready to get your notifications back? Here’s a step-by-step guide to help you deactivate Do Not Disturb like a pro.
Method 1: Using the Control Center
This is the quickest way to turn off Do Not Disturb. Swipe down from the top-right corner of your screen (or swipe up from the bottom if you’re using an older iPhone model) to open the Control Center. Look for the crescent moon icon—that’s Do Not Disturb. Tap it once, and voilà! You’re back in the game.
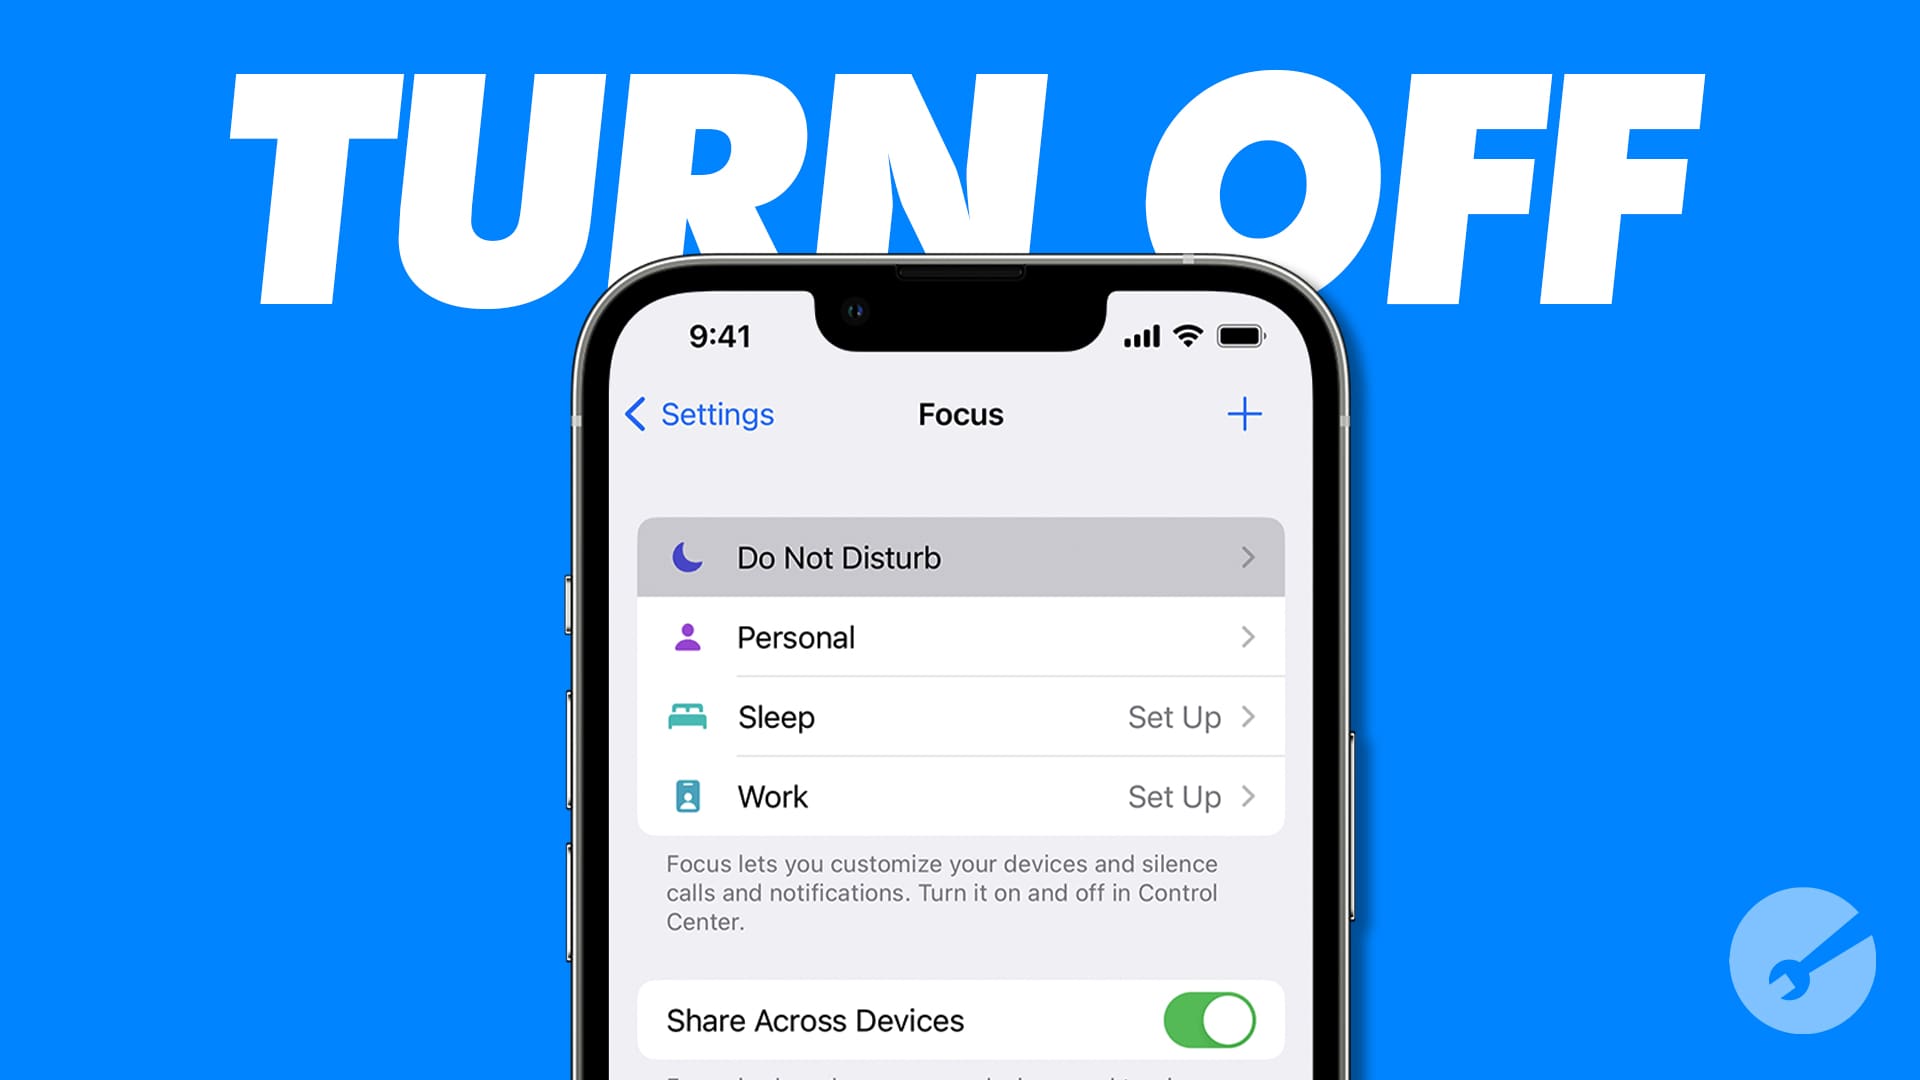
Method 2: Through Settings
If you prefer a more thorough approach, head to your Settings app. Tap on “Settings,” scroll down to “Do Not Disturb,” and toggle the switch off. This method also lets you check if it’s scheduled or set to automatic, which can help prevent accidental activations in the future.
Method 3: Using Siri
Who says you have to do everything manually? Just say, “Hey Siri, turn off Do Not Disturb,” and let your virtual assistant handle it for you. Easy peasy, right?
Troubleshooting Common Issues
What if Do Not Disturb won’t turn off? Don’t panic. Here are a few troubleshooting tips to help you out:
- Check if it’s set to a schedule. If it is, adjust the timing in Settings.
- Restart your iPhone. Sometimes, a simple reboot can fix the issue.
- Ensure your device is updated to the latest iOS version.
If none of these work, it might be time to visit Apple Support or consult a professional.
Customizing Your Do Not Disturb Settings
Prevention is better than cure, right? To avoid accidental activations, customize your Do Not Disturb settings:
- Set specific times for it to activate automatically.
- Allow calls from favorite contacts or specific groups.
- Enable it only during certain events, like meetings or bedtime.
These tweaks can help you stay in control without losing the benefits of Do Not Disturb.
Why Knowing This Matters
In today’s fast-paced world, staying connected is crucial. Whether it’s for work, family, or personal reasons, knowing how to manage your Do Not Disturb settings can make a huge difference. It’s about balance—finding that sweet spot between peace and productivity.
And let’s not forget the bigger picture. Understanding your iPhone’s features empowers you to use it more effectively, enhancing your overall user experience. So, whether you’re an iPhone 13 user or planning to upgrade, mastering Do Not Disturb is a skill worth having.
Expert Tips and Tricks
Here are a few expert tips to take your Do Not Disturb game to the next level:
- Use Focus Modes for more granular control.
- Create custom notification groups to prioritize important alerts.
- Regularly review your settings to ensure they align with your needs.
These tricks can help you optimize your iPhone experience, making it more efficient and tailored to your lifestyle.
Real-Life Scenarios and User Stories
Let’s talk about real-life situations where knowing how to turn off Do Not Disturb can make a difference:
- Imagine you’re waiting for an interview call, but Do Not Disturb is on. Quick fixes save the day.
- Picture yourself at a party, wanting to stay connected without being bombarded by notifications. Custom settings to the rescue!
These stories highlight the importance of mastering your iPhone’s features, ensuring you’re always prepared for life’s unexpected twists and turns.
Final Thoughts and Call to Action
Alright, we’ve covered everything from the basics to the advanced tricks. Turning off Do Not Disturb on iPhone 13 is simple once you know the ropes. Whether you use the Control Center, Settings, or Siri, the choice is yours. The key is to customize your settings to suit your lifestyle, ensuring you stay connected when it matters most.
Now it’s your turn. Try out these methods, customize your settings, and let us know how it goes. Leave a comment below, share this article with your friends, and explore more of our content for all things tech-related. Stay connected, stay informed, and most importantly, stay in control!
Table of Contents
- How to Turn Off Do Not Disturb on iPhone 13: The Ultimate Guide
- Understanding Do Not Disturb on iPhone 13
- Why Would You Want to Turn It Off?
- Step-by-Step Guide: How to Turn Off Do Not Disturb on iPhone 13
- Method 1: Using the Control Center
- Method 2: Through Settings
- Method 3: Using Siri
- Troubleshooting Common Issues
- Customizing Your Do Not Disturb Settings
- Why Knowing This Matters
- Expert Tips and Tricks
- Real-Life Scenarios and User Stories
- Final Thoughts and Call to Action
Hope this guide helped you out. Remember, mastering your tech is all about trial and error, so don’t be afraid to experiment. Until next time, keep it real, and keep it techy!
Detail Author:
- Name : Otto Hegmann PhD
- Username : kreiger.lionel
- Email : jevon45@yahoo.com
- Birthdate : 1986-03-09
- Address : 488 Sheldon Views Suite 433 New Cristal, FL 28173
- Phone : 959.237.6821
- Company : Kiehn Inc
- Job : Biologist
- Bio : Et voluptatem quis consequatur ut aliquid inventore omnis. Quis laborum eveniet rem labore nisi quasi. Illo id deserunt delectus sint. Quidem dignissimos harum vitae qui quas neque.
Socials
twitter:
- url : https://twitter.com/johnsonc
- username : johnsonc
- bio : Delectus consectetur doloribus nihil nostrum nihil. Voluptatum enim cum et eos veniam molestias et. Saepe eveniet perspiciatis et quis sed.
- followers : 6167
- following : 2118
facebook:
- url : https://facebook.com/johnson1992
- username : johnson1992
- bio : Eius fugiat dolorum voluptas eaque quos.
- followers : 714
- following : 2962
